Friday, August 26, 2011
Sharing best practices involving technology
As educators, we all struggle with ways to avoid reinventing the wheel. The Internet has certainly helped in this regard - it is the 'go to' place for so many ideas, that - when a new idea hits me, my first step is to search the web and see if and how others have approached it. But what about great ideas and best practices within my own district and building? Ironically, the ideas put into practice three doors down the hall often seem more remote than than the ones posted to some blog from across the country.
Why is that? Teachers tend to be islands - we get mired down in the day-to-day, and our 'free time' - prep periods and meeting block times - are far from free - we're grading, designing materials, contacting parents, updating homework sites, meeting with administration, giving extra help... and, at least in my district, budget constraints have eaten into this time even more - we've lost PD time, so meeting slots that might have been spent collaboratively become times for dealing with administrative issues.
So, how can we address this, and find time to use the resources closest to us - our colleagues in the building?
In my school system, we've created a stipend-based position, the TTL - Teacher Technology Leader. The idea is that, in each building, there are a few educators who try to keep their fingers on the technological pulse, as it were, and help their peers gain experience and comfort regarding integrating the new tools into their traditional toolbox.
Last year was our first go at this - it was a growing process, and the parameters of the role were ambiguous at best. Most teachers weren't really aware of our role in the buildings, and - with the TTLs themselves in a bit of a gray area - our skills were under utilized. So, how do we better use this position to help all teachers work more collaboratively, and stay informed regarding ideas and tools that others have found successful, within the time and budgetary constraints of a system?
Here are some ideas I have...
*I learned that, at the elementary schools in my district, they have a ‘coaching substitute” - a floating sub who can cover classes in order for a teacher to go observe / get PD. This is a great idea (why didn't my school know about this?) - this gives educators a chance to step out of their room and into that classroom down the hall, to observe that new tool / idea in use...
*... which brings up the next question - how can we help teachers know what great ideas are available in the building, so they can make an informed decision about who and what to observe? I think the TTLs should work as a hub for disseminating good models of technology use in the building – basically, we can reach out to staff, with emails, brief reminders at meetings etc., encouraging teachers to share what they are doing with us. We can then set up a time to observe it ourselves, and report back to department heads to then encourage use and discussion amid the department staff. We could set up a spreadsheet on which people can sign up to observe a class - using Google Calendar's new appointment feature, potentially, and help streamline the process.
*The key is that we need to firm up a structure / framework from top down, and encourage greater effective use of technology, along with collaboration. What has tended to happen is we’ve had good ideas floating around the building but, as with most great ideas, actually sharing and implementing them beyond the individual rooms can be difficult... Using the TTLs as a conduit seems to make some sense in this regard.
*Beyond this, we can also firm up a schedule / opportunities for TTLs to coach our peers – set periods where we can go in and help other teachers (1 or 2 of our meeting periods per week) plus other times where we can get a dept chair to help cover a class while we go set something up / guide someone in tech use or run a mini pd for a period, perhaps in conjunction with a teacher who has successfully implemented a lesson.
*As part of this, we will probably start with a weekly email to staff, highlighting one idea or one tool that teachers may want to put to use, and directing staff to this blog or another site for more information. The key is to keep that email brief, so it will actually be read, and not become another piece of spam fodder...
It seems to me that the key is to have a good, clearly defined set of descriptors for the TTLs - a clear process and structure that is consistently applied.
How has your system addressed these needs? What other ideas are floating around??
Thursday, August 18, 2011
Google Docs for graphic organizers
One of the central goals I have each year is to teach my students to articulate themselves well. They need to be able to form cohesive, well-supported arguments as they draft their responses. A critical part of this is the graphic organizer - getting them to plan their work, test each part of a paragraph to make sure it supports a central point, before they type it up.
My vehicle for teaching this is the Essay Map:
Students learn the acronyms, and then create their own version of the map to help internalize how the parts all fit together. Then, when we get to a writing assessment, they are given graphic organizers that look like the images on the slide.
Up until last year, these organizers were strictly on paper.
Here is what my paper organizer for a paragraph looked like:
This worked fairly well, but it did have some limitations:
The online version looks like this:
This new format worked well - by changing the share setting from private to 'anyone with the link' and making sure no one else could edit it, I enabled my students to create their own copies for their use. I took a few minutes in class to walk them through the process - go to the link on our discussion board, make sure you're logged in to your Google Docs account, and then click 'make a copy.' Rename it with your period, name, and the assignment, then share it with me. I then walked them through some basics - how to add in more boxes if you need them, how to delete ones you don't need, etc.
Students were now able to organize their papers online. The new format gave them more guidelines, and was adaptive to their needs - as they filled in a box, it became larger as they typed - no more squeezing information into a set size. They could add, remove, or move items without the organizer becoming cluttered... and it has these added benefits:
My vehicle for teaching this is the Essay Map:
Students learn the acronyms, and then create their own version of the map to help internalize how the parts all fit together. Then, when we get to a writing assessment, they are given graphic organizers that look like the images on the slide.
Up until last year, these organizers were strictly on paper.
Here is what my paper organizer for a paragraph looked like:
This worked fairly well, but it did have some limitations:
- Students would often be crowding information into the boxes - especially kids with large, "poofy" handwriting (the sort that can fit little faces inside the dots over their "i's")
- It became messy, as items were crossed out or adjusted based on suggestions - an arrow to indicate one idea needed to come before another one, etc.
- Those who had either more or less examples than the number of boxes felt locked in, or pressured to have a regimental number of points in each paragraph.
- Fitting everything on the organizer meant there was room for just the boxes, not any real guidelines.
The online version looks like this:
This new format worked well - by changing the share setting from private to 'anyone with the link' and making sure no one else could edit it, I enabled my students to create their own copies for their use. I took a few minutes in class to walk them through the process - go to the link on our discussion board, make sure you're logged in to your Google Docs account, and then click 'make a copy.' Rename it with your period, name, and the assignment, then share it with me. I then walked them through some basics - how to add in more boxes if you need them, how to delete ones you don't need, etc.
Students were now able to organize their papers online. The new format gave them more guidelines, and was adaptive to their needs - as they filled in a box, it became larger as they typed - no more squeezing information into a set size. They could add, remove, or move items without the organizer becoming cluttered... and it has these added benefits:
- I can pop in and give feedback at any time - in the sidebar, or the document itself.
- Student work is always saved, always accessible - no lost papers
- Through the revision history, I can monitor how much time someone is spending on the organizer, and offer feedback accordingly.
- Once the student is done organizing, they can take the raw material and copy it into a new document, to convert into a full draft - no more writing things out twice.
- At the end of a unit, I have sample organizers and drafts, to help teach other students the writing process.
Thursday, August 11, 2011
Google Docs for group classwork
On my team, we use Google Docs for a lot of our "paperwork" - each student sets up an account at the start of the year, and each teacher on team also has a Google Docs account (our school has also partnered with Google, so that we have our own 'channel' on google docs).
I've already discussed one way we use GD on team - students do their organizing and drafting of papers right online, streamlining the writing / editing process while saving a ton of paper (with school budgets being what they are, every dime counts!).
Beyond this, we do a number of collaborative tasks - both among the staff and the students - through GD as well. Our team newsletters, sent out at least monthly, used to be constructed via a chain of emails - each teacher would send me their snippet, I'd then merge them into a doc, and then send it out. Now, we keep a newsletter "shell" and just fill it in by a set time / date - each of us adding our blurb when we have the time - and then, once it's set, I email it out and post it on our team discussion board. Much easier.
Last year, I wanted to use GD to facilitate collaborative discussions among the students, as well. I started with a fairly standard classroom discussion model: while reading Crispin, at set intervals students met in groups to discuss specific chapters. The kids had been tracking facets of the novel in a series of shell note sheets, and - on discussion days - kids would be put into groups, and each group was given one facet as a focal point. After a few minutes, they would send one member to the board to write a key quote they found, and their group's analysis of its importance. We'd then discuss these as a class.
This format had a few problems. First, the board would get crowded pretty quickly - as would the space where students stood while writing. Often, one student would have to wait for another to finish. Second, the work was transient - by the end of the period, I'd have to erase the work in order to be ready for another class.
So, this brought me to my inquiry - could I figure out a way to use GD to streamline the process and eliminate the bottleneck, while using only a limited amount of computers (we have a laptop cart on team that, usually, only has around 6 working units).
Here's what I came up with. My solution uses 6 laptops and one LCD projector.
I began by setting up a discussion document that students could access on Google Docs. I made it public, so anyone could edit it, and posted the link on the class discussion board. It looked like this:
Each group was then given a laptop, and I hooked my laptop up to the LCD projector. I projected the master document onto the wall.
I then gave each group two slips of paper - the first was the topic they had to post about, the 2nd was the topic posting they'd comment on.
Groups went to work. As they decided on the quotes and analysis for their posts, I could see each group typing in real time, as could the rest of the class. Once a group finished their post, they then read another group's entry and responded to it. The filled in form, in class, looked like this:

By the end of the period, we had a full chart - you can see the results here. I then saved the document under a new title - indicating the assignment and the period - and turned off the "anyone can edit" option. I then went back to the master document, clicked on "revision history," selected the original, blank version, and reverted to it -- I was ready for the next class, had saved all the work the kids did, and it was much faster than erasing the board!
At the end of the day, I then posted links to all the finished discussion documents on our discussion board:

This way, students could reference these discussions later - especially when gathering evidence for major assignments. Also, they could see the key ideas developed in the other classes - something that was impossible on a standard white board.
Overall, this approach worked out better than I had anticipated. It had the following benefits over my old way of doing things:
I've already discussed one way we use GD on team - students do their organizing and drafting of papers right online, streamlining the writing / editing process while saving a ton of paper (with school budgets being what they are, every dime counts!).
Beyond this, we do a number of collaborative tasks - both among the staff and the students - through GD as well. Our team newsletters, sent out at least monthly, used to be constructed via a chain of emails - each teacher would send me their snippet, I'd then merge them into a doc, and then send it out. Now, we keep a newsletter "shell" and just fill it in by a set time / date - each of us adding our blurb when we have the time - and then, once it's set, I email it out and post it on our team discussion board. Much easier.
Last year, I wanted to use GD to facilitate collaborative discussions among the students, as well. I started with a fairly standard classroom discussion model: while reading Crispin, at set intervals students met in groups to discuss specific chapters. The kids had been tracking facets of the novel in a series of shell note sheets, and - on discussion days - kids would be put into groups, and each group was given one facet as a focal point. After a few minutes, they would send one member to the board to write a key quote they found, and their group's analysis of its importance. We'd then discuss these as a class.
This format had a few problems. First, the board would get crowded pretty quickly - as would the space where students stood while writing. Often, one student would have to wait for another to finish. Second, the work was transient - by the end of the period, I'd have to erase the work in order to be ready for another class.
So, this brought me to my inquiry - could I figure out a way to use GD to streamline the process and eliminate the bottleneck, while using only a limited amount of computers (we have a laptop cart on team that, usually, only has around 6 working units).
Here's what I came up with. My solution uses 6 laptops and one LCD projector.
I began by setting up a discussion document that students could access on Google Docs. I made it public, so anyone could edit it, and posted the link on the class discussion board. It looked like this:
 |
| scroll over pic to see descriptions of key elements |
Each group was then given a laptop, and I hooked my laptop up to the LCD projector. I projected the master document onto the wall.
I then gave each group two slips of paper - the first was the topic they had to post about, the 2nd was the topic posting they'd comment on.
Groups went to work. As they decided on the quotes and analysis for their posts, I could see each group typing in real time, as could the rest of the class. Once a group finished their post, they then read another group's entry and responded to it. The filled in form, in class, looked like this:

By the end of the period, we had a full chart - you can see the results here. I then saved the document under a new title - indicating the assignment and the period - and turned off the "anyone can edit" option. I then went back to the master document, clicked on "revision history," selected the original, blank version, and reverted to it -- I was ready for the next class, had saved all the work the kids did, and it was much faster than erasing the board!
At the end of the day, I then posted links to all the finished discussion documents on our discussion board:

This way, students could reference these discussions later - especially when gathering evidence for major assignments. Also, they could see the key ideas developed in the other classes - something that was impossible on a standard white board.
Overall, this approach worked out better than I had anticipated. It had the following benefits over my old way of doing things:
- It streamlined the sharing process - each group could write 'on the board' at the same time.
- Whereas before I'd be hard pressed just to get all the initial quotes on the board during a period, I now had time for the students to critique one another.
- No more handwriting issues on the board - easy to read font.
- By saving the work in these files, the current students could review their peers' work later, and I could even incorporate the class work into a reflective piece later on (like reviewing the posts for homework, and choosing the strongest analysis).
- I have exemplars for future students / years.
- I also found that students became eager to revise their work - on a number of occasions, while one group was critiquing another group's response, I'd see a cursor going back over the original post, trying to improve it before the commenter was even done typing!
Wednesday, August 10, 2011
An Interesting way to organize online resources
Basically, it allows you to create tabbed pages that resemble a standard accordion binder in the visual layout:

In each tab, you can upload or link to content that is thematically related to your binder's topic - up to a total of 100MB per account (this is the free version - it's still in Beta, and they will eventually have a pay version with more bells and whistles).
Once you register, you can start creating binders, which you store on your "shelves" What is a shelf, you ask? A shelf is where you can save any binders you find interesting - whether created by you or others - making it easy to access the content that most interests you.You can then embed either binders or entire shelves into your webpage.
Creating a binder is easy, using their fairly intuitive interface (the first item on your shelf when you register is a how-to manual that walks you through the process). You can quickly embed webpages, images, videos, sound files, text documents... of course, with the 100 MB limit, you'll want to use more links than actual uploaded files - put the videos on YouTube and the docs / presentations on Google Docs and you'll save yourself a ton of space...
So, how is this different from just creating a regular webpage or blog, and why should you use it in your classroom? At first, I wasn't sure I'd want to incorporate this - after all, there are always new things bubbling up, and many of them really don't add a whole lot to the table. However, as I played around with the site and searched through the content, I found that it has some potential:
- Within a tab, you can embed a live webpage, with text next to or beneath it - this allows you to guide students to the facets of the webpage which you deem important, or to post questions for them to answer as they explore the page.
- The format is more visually appealing than a standard page of links - with a caveat: I saw a number of binders where the author was a bit excessive in the use of sub-tabs - so, underneath the main tab, I'd find three lines of sub-page titles - visually confusing and entirely overwhelming. SO, when used judiciously, it can be a nice way to draw students in.
- Looking through the binders created by others, I've found they cover a wide range of topics - with some careful searching, you can find some very good resource binders for your students or yourself.
- By embedding a binder into your webpage, you can create handout or research collections that are well organized and easily accessible, without cluttering your main page with links.
Overall, I think this tool can have a place in classrooms - when used well. As with any online content, a binder only as good as its author - so make sure to really cull through a binder before you decide to add it to your page or shelf and, when you create one, make sure to keep up with the content!
Tuesday, August 9, 2011
eEtiquette - some words to live by
Here's a nice little site - it has 101 'rules' for the digital world... searchable by topic tags. Some of these resonate quite well with the experiences I've had with my students, or my own personal issues... Here are a couple I found particularly relevant:
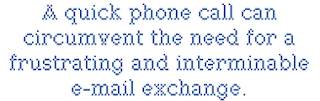 This is a big one with parent communications - my team has discussed the need to reach for the phone instead of a keyboard when informing a parent about something - parents can't hear the tone in an email, where "we're trying to show him the importance of doing homework" can sound stark and judgmental in an email, while the verbal inflection could be reassuring and supportive...

 This is a big one with parent communications - my team has discussed the need to reach for the phone instead of a keyboard when informing a parent about something - parents can't hear the tone in an email, where "we're trying to show him the importance of doing homework" can sound stark and judgmental in an email, while the verbal inflection could be reassuring and supportive...
This one is huge for my 8th graders - often, people post things from a distance that they would never say if face-to-face with their target....
So, how would I use these in the classroom? Here are a couple ideas:
- If your school has morning meeting time, using one or two as a discussion opener could be very valuable.
- Have students - alone or in groups - scan the site and find one that they think is important, to share with the class
- Post key ones near computers in your class room or media center, and rotate them occasionally.
Thursday, August 4, 2011
Web tools to give history context
Free Technology for Teachers has turned me on to a couple sites that, together, can be very powerful ways for students to contextualize time and place.
The first tool is Historypin - the video below highlights the new features, as of their July upgrade:
You can access Historypin via the internet or through an Android app. Online, there's an interactive map, where students can zoom in to a region and, as seen in the video, look at historic pictures and videos overlaid on a modern shot of the same location.
This is the sort of thing I could toy with for hours - to see what was, juxtaposed onto what is, is fascinating. They also have audio clips, collections of photos based on various themes, tours of a region based on an historic theme...
And if you install the Android app, you can use your phone to view historic photos of the location where you are standing -- provided they have those pics on file, or you can upload your own to create a tour of your town, or a field trip location...
How would I use this in the classroom? I can think of a number of applications:
 This project has received a lot of buzz, as well it should. On 10-10-10, people across the globe were asked to film their lives, and upload the footage. Together, these clips are being produced into one video that gives a snapshot of human life, on one day, on every continent. This video reminds me of another one - Babies - designed, similarly, to show our common humanity among our differences. Here are the trailers for both movies:
Often, we humans have a tendency to classify those who are different as 'the other' - losing touch with some of our common humanity. These videos bring us back in touch with one another, allowing us to see some of our commonality amid our differences.
How would I use these in the classroom? As I've mentioned, my students read a book based in Afghanistan - giving them some videos of daily life from that part of the earth, videos of normalcy beyond the ravages of war, would help them connect to the characters. This could apply to any cultural study...
So, there you have it. A couple great web tools for bringing our students closer to the times and places they study - and, more importantly, to the people who inhabit these locations.
The first tool is Historypin - the video below highlights the new features, as of their July upgrade:
You can access Historypin via the internet or through an Android app. Online, there's an interactive map, where students can zoom in to a region and, as seen in the video, look at historic pictures and videos overlaid on a modern shot of the same location.
This is the sort of thing I could toy with for hours - to see what was, juxtaposed onto what is, is fascinating. They also have audio clips, collections of photos based on various themes, tours of a region based on an historic theme...
And if you install the Android app, you can use your phone to view historic photos of the location where you are standing -- provided they have those pics on file, or you can upload your own to create a tour of your town, or a field trip location...
How would I use this in the classroom? I can think of a number of applications:
- In a history classroom, this could be incredibly powerful - especially when studying traumatic events like WW II - students can really grasp the level of devastation when viewing modern scenes, overlaid with pictures of, say Dresden after the bombing.
- Create a local history tour, for kids to grasp how their community has changed over time: visit your local library and get permission to scan / access historic photos, upload them to the site and link them to a current map. This could then be the basis for reflective writing, research...
- Classic photos are a great writing prompt tool - getting students to step into the minds and shoes of someone from another era, reflecting on the world through their eyes.
This project has received a lot of buzz, as well it should. On 10-10-10, people across the globe were asked to film their lives, and upload the footage. Together, these clips are being produced into one video that gives a snapshot of human life, on one day, on every continent. This video reminds me of another one - Babies - designed, similarly, to show our common humanity among our differences. Here are the trailers for both movies:Often, we humans have a tendency to classify those who are different as 'the other' - losing touch with some of our common humanity. These videos bring us back in touch with one another, allowing us to see some of our commonality amid our differences.
How would I use these in the classroom? As I've mentioned, my students read a book based in Afghanistan - giving them some videos of daily life from that part of the earth, videos of normalcy beyond the ravages of war, would help them connect to the characters. This could apply to any cultural study...
So, there you have it. A couple great web tools for bringing our students closer to the times and places they study - and, more importantly, to the people who inhabit these locations.
Wednesday, August 3, 2011
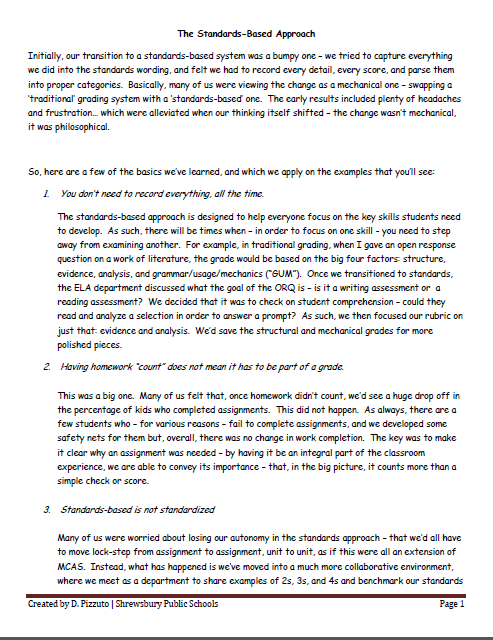
The Standards Based Approach
I know this post veers from the tech topic a bit, but I think it's worth including.
My school system uses a standards-based approach for the design, implementation, and assessment of skills, up through grade 8. Implementing this was something of a learning curve: initially, I was a stalwart against it. I mean, if we got rid of individual grades in a class - no more As, Bs, Cs, etc. and replaced them with a 4-3-2-1 that ONLY assessed the skills, without taking factors like homework completion into account, weren't we inviting disaster? Wouldn't kids take advantage of this system?
My school system uses a standards-based approach for the design, implementation, and assessment of skills, up through grade 8. Implementing this was something of a learning curve: initially, I was a stalwart against it. I mean, if we got rid of individual grades in a class - no more As, Bs, Cs, etc. and replaced them with a 4-3-2-1 that ONLY assessed the skills, without taking factors like homework completion into account, weren't we inviting disaster? Wouldn't kids take advantage of this system?
 |
| Download PDF here |
Five years into the implementation, I've gone from trying to be the 'guardian at the gate' - protecting the status quo - to helping run PD for other systems that are moving down a similar path. Honestly, I don't know if I could go back to my old grade system - the philosophical shift behind the shift in numbers was massive.
In order to facilitate this process in other systems, I created a short introductory handout designed to help with one of the more difficult facets of the standards-based approach: record keeping. I've included the PDF here, and hope you find it useful. If you're interested in the handouts I describe, or want any more information, let me know.
Thursday, July 28, 2011
KWL for the New Literacies Era
One of the basics in the teacher toolbox is the old KWL chart - you know the one, where you introduce a new topic by having kids brainstorm what they Know and what they Want to know, and then revisit the chart at the end to document what they have Learned. That's all well and good, but - by hopping from the intro to the conclusion, it misses the whole process.
Thanks to Langwitches, and the Curriculum Mapping Institute, we have a couple new takes on this old tool.
Here's the first:

 Here, I created four columns - one for each stage - and the nice thing with Wallwisher is students can embed links to whatever resources they discover during the process. Anyone can add to the poster, and it is viewable at any time.

Thanks to Langwitches, and the Curriculum Mapping Institute, we have a couple new takes on this old tool.
Here's the first:
One little letter can change anything: the H is for "How will we find out" - looking ahead to the process of discovery - and can also be post-reflection: "How did we learn it?" This is critical for the critical skills we're teaching our kids - they are immersed in sources of information and knowledge, and tracking this process - making them active participants in the discovery of information - livens the old KWL and focuses their efforts on the research itself.
How to implement this? One problem I've had with traditional KWL charts is the chart paper part - I'd fill one out, and forget about it... or lose it in some stack on top of a cabinet, where all old posters go to die... (yes, I know, I should leave it on the easel of chartpaper, and flip back to it, but I never keep that big easel kicking around, either...) Why not create a digital, web-based chart that students can update throughout a unit, perhaps requiring posts at key points throughout? This can be done on a blog, or on a Web 2.0 app like Wallwisher:
 Here, I created four columns - one for each stage - and the nice thing with Wallwisher is students can embed links to whatever resources they discover during the process. Anyone can add to the poster, and it is viewable at any time.
For those who really enjoy acronyms, the chart has also been expanded to this:

This format takes the KWL to another level, and is particularly good for action projects - where students are expected to take what they've learned and apply it to real-life problems and situations, to make change. Within this, we add on two new phases to the process:
A is for "What ACTIONS will we take?"
Q is for "What QUESTIONS do we now have?"
The Q really anchors the entire thing into a constant process - a growth model that emphasizes learning as continuous, as new knowledge and action leads to further questions worth exploring.
The Process of Creating
This great little video shows all the steps that Picasso went through in order to create his painting - as it plays, you can see elements get added, changed, distorted...
This video would make a great discussion opener - for art class, ELA... any class in which creation is a process. Often, when I'm teaching writing, I find students who are attached to a particular construct, idea, or sentence. One of the toughest lessons for a writer to learn is that it is a process - that, much like a sculptor might reshape clay to better convey their idea, a writer needs to reshape their words.
Letting students see that the act of creation often contains acts of change - which can seem like destruction at the time - is important.
Widening the net
So... I've decided to broaden the focus of this blog.
Each day, as I've been culling through my RSS reader and the net as a whole, I've found numerous items worth discussing that focus on other subject areas in my building, ideas I'd like to bring up with my colleagues. Thus, from here on out, the blog will focus on critical thinking skills at the middle level as a whole, not solely in ELA.
Coming up: some connections for art and social studies classes...
Tuesday, July 26, 2011
Thinglink: 5 ways to use it in your classroom
A recent post on Free Technology for Teachers really caught my eye:

This little add-on is pretty clever - it allows you to add scroll-over text to any image in your blog. Take the example below - scroll your mouse over the picture.

Through installing the add-on, I am able to add these text points - and links - anywhere in a picture. I also have the option of allowing others to do the same - anyone can come on and add their commentary.
This brings us to classroom applications...
1. To prompt classroom discussions. To spur discussion on a topic, you could do something similar to the example above - create a picture with several scrollable text points. Each one can pose a question - historic, analytic, whatever. In the classroom, students can be grouped for small discussions, each group given access to the image on a shared laptop /tablet. For five minutes, each group discusses the prompts, choosing one on which they'll focus. This can then lead into a whole-group discussion / analysis of the image.
Consider the possibilities for art history, connecting images / art objects to texts being studied, etc.
2. As a discussion extension on a blog. Earlier, I talked about setting up a blog for novel discussions across teams. A good discussion prompt would be one of these pictures - using it as a menu, with several discussion bases embedded in it, based on which students post their entries and build off of one another's ideas.
3. For group presentations / collective assignments. Student groups could each be assigned an image, with a requirement to label / analyze x amount of elements. For example, a colleague of mine - Jeremy Mularella - starts his science class with a lab safety unit which culminates in a CSI-styled investigation of a lab accident, to determine which safety rules were violated. This could be augmented with posted shots of the 'crime scene,' on which students tag the various elements of the scene which portray broken safety rules.
4. To create descriptive how-tos. When walking students (or associates) through a a problem, or elements of a diagram, etc. This could be a very useful tool for giving additional information on a particular image. A scroll-over of specific materials laid out for a lab, etc. I sometimes post screen shots of exemplars - I could use the scroll-overs to highlight elements of the example that are particularly note worthy.
5. For a visual quiz / self-test. In a language class, or any class with vocabulary, including an image that has visual representations of the terms could be very useful - the terms themselves are not visible until the mouse interacts with them, so a student could quiz themselves and then use the scroll-over feature to check their answers.
Saturday, July 23, 2011
A way to help those procrastinators

Having just read Richard Byrne's post on task management tools for students, I am struck by the potential of one of the tools he describes.

Once you hit send, the recipient will get reminders until they respond that the task is completed.
While I wouldn't use this with all students - it would be tedious at best, and annoying and enabling at its worst - it could be quite useful for a few chronic procrastinators, or for the occasional parent who really needs to keep on top of what the child is doing towards a particular task.
Friday, July 22, 2011
Fakebook - a nice way to do character analysis
On my team last year, the social studies teacher had students creating imaginary Facebook pages to demonstrate their understanding of historic figures. The students planned them out on a template, then created paper versions of the imagined online profiles. The results were good, but the irony of creating a paper simulacrum of a digital identity really stood out. I imagined using a similar tool in my class, wherein students would track a character's development through a profile page - for A Midsummer Night's Dream, I could imagine Oberon's profile: for relationship status, he's put "it's complicated;" his current status could easily be "is invisible and watching two humans argue." He would friend almost any female that crossed his path, be alternately attached to and then unfriended by Titania, etc.
What held me back was the paper aspect.
 Along comes Fakebook - a very easy to use mock up of a Facebook profile page. Students click on fields and fill in the details - creating a product with no concerns about formatting, layout, design - it's all there. Students can save their work, print it, or even embed them into a class page or blog, should they choose and - with some planning - a teacher can quickly review them online or collect paper copies for assessment purposes.
This sort of tool is a great one for teachers just getting their feet wet with online assignments - and it's just one of the many tools available from Classtools.net - I urge everyone to give it a look!
Thursday, July 21, 2011
Google Docs for Drafting and Editing
This past year, I transitioned from traditional pen-and-paper peer editing to an online format using Google Docs. This was made possible by having each student set up a Google Docs account at the start of the year, when we sent home a permission form to the parents of each child on my team. We received 100% support: each form came back, and all kids signed up.
When it came time to write our first paper, I spent a class period going over how to use Google Docs instead of the traditional Word. One of the key points I figured out was that I needed a clear system by which students would name their files, and a protocol for sharing them with me. For naming, I chose a combination of descriptors that I would use all year: Period, Assignment, First initial and last name - for example, if Milan Kundera were in my period G class, and he created a draft of his essay for Under the Persimmon Tree, his file name would be: G UTPT Essay M Kundera. This is critical because, as the year gets rolling, I end up with tons of documents cluttering my Google Docs home screen. I need a quick way to sort and file them: I create folders for each period, and then subfolders for each unit / assignment.
Then, when assignments come in, I can quickly sort by period and assignment, and drop the papers into their proper folders, keeping my home screen cleared.
So, with naming settled, I shared my email address with the students for sharing purposes, and I was ready to roll, and assignments started coming in.
One other little trick: I use the 'star feature as a way to check off when I've reviewed someone's draft - that way, I can quickly track which assignments I still need to see.
I've found that using GD has a number of benefits over the traditional paper form of doing business. These benefits include:
When it came time to write our first paper, I spent a class period going over how to use Google Docs instead of the traditional Word. One of the key points I figured out was that I needed a clear system by which students would name their files, and a protocol for sharing them with me. For naming, I chose a combination of descriptors that I would use all year: Period, Assignment, First initial and last name - for example, if Milan Kundera were in my period G class, and he created a draft of his essay for Under the Persimmon Tree, his file name would be: G UTPT Essay M Kundera. This is critical because, as the year gets rolling, I end up with tons of documents cluttering my Google Docs home screen. I need a quick way to sort and file them: I create folders for each period, and then subfolders for each unit / assignment.
 |
So, with naming settled, I shared my email address with the students for sharing purposes, and I was ready to roll, and assignments started coming in.
One other little trick: I use the 'star feature as a way to check off when I've reviewed someone's draft - that way, I can quickly track which assignments I still need to see.
I've found that using GD has a number of benefits over the traditional paper form of doing business. These benefits include:
- Being able to set deadlines at more flexible times. For example, I might have one paragraph of a draft due by Friday evening at 9 pm - by that time, students need to share it with me.
- Being more focused in feedback I give. One problem I had with collecting drafts was I'd comment on everything. On GD, I set myself a couple limits: I would post 2-4 comments, focusing on big areas of concern in a document, and I came up with a set list of shorthand comments that I could use, such as a generic "GUM" at the top of a paper if the student needed to work on grammar / usage / mechanics. I've found that, by giving just a few good comments, students are better able to focus on making improvements and I spend less time marking up papers.
- I can track student progress when necessary. For example, through looking at revision history, I can see when a student worked on a document. This has been helpful in parent discussions, to be able to show that someone either hadn't touched a document in the two weeks prior to a due date or that someone was spending entirely too much time on their work. Either way, it's a great starting point for a conversation with the student or the parent.
- I have immediate access to exemplars. When work comes in, I can flag documents that stand out, copy them into new docs, and remove student names. On research papers, I've been able to create a 'master bibliography' by merging the works cited from several top students.
- I can give live support to students who need it. On occasion, I've seen that a student was actively working on a document while I was online - I am able to access the document and discuss the work with the student. Often, it's a quick "How's everything going?" in the side bar, giving them a chance to ask questions if needed.
For peer editing, GD has proved a boon as well. Editing on paper was always difficult - it had to be completed in school (unless students trusted one another with hard copies of their documents), and the quality of the editing was entirely dependent on who actually got the document. This was a problem - after all, we all have students who really need a lot of help on their paper, do we pair them with the solid writers? What then happens to the solid writer's paper - will she or he get any good feedback?
Online editing is an easy fix for the time constraints. Students can start their editing in class, and finish it at home overnight or over a weekend. Then, to fix the issue of editing quality, I created peer editing groups. Within each group, each student is given a specific task - for example, student A might be responsible for checking the first body paragraph for content and integrity - does it support the thesis statement? How? This way, each paper has several editors examine it, and students focus on specific structural elements, rather than the document as a whole. Overall, this has worked quite well.
My next step in this process is to broaden the audience for these papers. Last year, the writing and editing was contained within my team. This coming year, I hope to collaborate with another 8th grade team (we all cover the same units, in roughly the same order) so that both my students and myself can gain from the perspectives of others who, while familiar with the texts we are reading, bring in a different set of classroom experiences. This pushes the comfort zone a little - how will my students compare with another teacher's? What strengths and weaknesses within my own skill set will be exposed?
This is a door I'm looking forward to opening.
If you have experience using Google Docs for peer editing, or have other suggestions regarding editing collaboratively with other teams / students beyond your classroom, I would appreciate your ideas!
If you have experience using Google Docs for peer editing, or have other suggestions regarding editing collaboratively with other teams / students beyond your classroom, I would appreciate your ideas!
Use of short videos in the classroom
Thanks to Larry Firlazzo for pointing out this great video...
It ties in nicely with the theme I use all year - "How Can a Voice Be Heard" - and gives a good discussion opener for setting the tone:
I don't know how many times I tell students that word choice is vital but - no matter how many times I do - this short video makes the point much better than I could. I envision showing it without any introduction, and then opening a discussion about why I showed it, what message it gives, and how it connects with my class theme.
Generally, I open my units with some sort of media piece - a song accompanied by a video, or a short clip to get students thinking about the major themes. For example, when I teach Under the Persimmon Tree (which focuses on two lives affected by the war in Afghanistan), I open with the song "This is Me" by Eddie from Ohio, set to a montage of images from Afghanistan:
Students watch the video with no prior knowledge, and are given a copy of the lyrics. We then return to the song several times through the unit, and students focus on connections between the lyrics and the characters in the book during a series of Socratic Circle discussions. I find that I can really see how their perceptions are changing, based on how their interpretation of the same lyrics changes as the story develops.
So, it seems logical for me to open the year with a short media piece - and I would love to hear from people who have found other such connections, that really hammer home the power of words.
Subscribe to:
Posts (Atom)